El beauty blender es una herramienta de aplicacion que se utiliza para aplicar maquillaje. Es fantastica! Funciona para practicamente todo, desde base hasta corrector, hasta blush, bronceador, simplemente TODO! Para utilizarlo primero debe mojarse para que la esponja crezca y pueda difuminar mejor el maquillaje y dar un acabado bello y natural.
19 de marzo de 2013
Beauty Blender Dupe! -Que es el beauty blender?
El beauty blender es una herramienta de aplicacion que se utiliza para aplicar maquillaje. Es fantastica! Funciona para practicamente todo, desde base hasta corrector, hasta blush, bronceador, simplemente TODO! Para utilizarlo primero debe mojarse para que la esponja crezca y pueda difuminar mejor el maquillaje y dar un acabado bello y natural.


How to get THE BEST OUT OF YOUR LASHES! ♥
You can avoid using false eyelashes and maybe having the embarassing
experience of them un-gluing while you are out with this quick and easy
tips on how to get the best out of your eyelashes! It's very quick and
easy, and all you will need is an eyelash brush, and a mascara.
(Optional, mascara base -white mascara).
Curl only the root of your lashes.
(Optional: Use eyelash "base" -white mascara)
The second step is to apply your mascara. Now, apply it while bringing the lashes out, to make sure that you are not only applying product, but getting them as long as you can as well. Apply as many layers as needed.
Brush them again. It will avoid having lumps in your lashes, and it will elongate them even more, since they now have the mascara and are thicker.
This tip will give you thick, long lashes :D
Thanks for reading; Hope you enjoyed!!! ♥
The first thing you're going to need is an eyelash brush, which look like this
Curl only the root of your lashes.
(Optional: Use eyelash "base" -white mascara)
The second step is to apply your mascara. Now, apply it while bringing the lashes out, to make sure that you are not only applying product, but getting them as long as you can as well. Apply as many layers as needed.
Brush them again. It will avoid having lumps in your lashes, and it will elongate them even more, since they now have the mascara and are thicker.
This tip will give you thick, long lashes :D
Thanks for reading; Hope you enjoyed!!! ♥
COMING SOON! ♥ COMPLETE ROMANTIC LOOK WITH ONLY 4 PRODUCTS!

Look COMPLETO romantico usando solo 4 Productos!!!
COMPLETE romantic look using only 4 products!!! ♥
Stay tuned,
-xoxo
11 de marzo de 2013
Cadenas para el pelo / Chain Halo

I am a mixture of things (personalities) and hence have a mixture of styles, but what also predominates is my 'bohemian' vibe. I LOVE Chain Halos because they look very very very bohemian, and give any outfit a "different" feel to it. You can also DIY them. THEY ARE SO EASY (& fun) TO MAKE! (I already made my first one)
~
Soy una mezcla de personalidades y por ende tengo una mezcla de stilos, pero lo que siempre predomina es mi vibra 'bohemia'. AMO los halos de cadenas por que se ven muy muy muy bohemios y le dan a cualquier vestuario esa pizca de "diferente". Tambien es un accesorio que puedes hacer tu mismo (DIY). SON FACIL DE HACER Y MUY DIVERTIDOS. (Ya yo hice mi primer par).
- Simple chain Halo


Natural/Romantic Makeup Look using Only 4 Products!!!
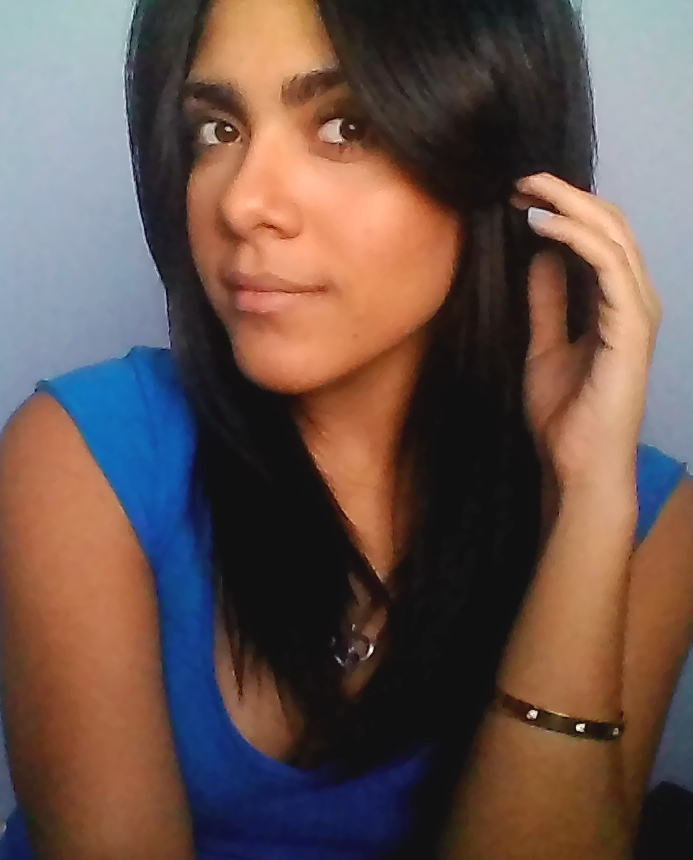
Achieving the “Natural Look” can be quite a hassle. Covering everything without looking like you have pounds of makeup on… yeah, It can be quite a challenge. I will share my everyday makeup routine, natural go-to with you ladies. Amazinglyyyyy, It is done using only FOUR products!! Full coverage, natural Romantic Look, light and easy to carry around and relatively inexpensive!♥
Conseguir el “look natural” puede ser toda una mision. Cubrir todo sin aparentar que tenes libras de maquillaje encima… Si, puede ser todo un reto. Compartire mi rutina diaria de maquillaje, la rutina a la que voy sin pensarlo dos veces para un look natural. Sorprendentemente solo se usan CUATRO productos!! Cobertura total, un look romantico natural, liviano y facil de cargar y relativamente barato!♥
PROCESO Y PRODUCTOS USADOS

- ELF all-over cover stick
- MAC Studio Fix Shade (NC42)
- ELF Contouring Blush & Bronzing Powder
- Maybelline ‘The Falsies’ Mascara
*

1) I applied ELF all-over cover stick first (in shade Spice), not worrying about it being too light (yet not over-doing it). I applied this under my eyes and all over my face where I needed concealer.
1.Aplique el corrector de ELF debajo de mis ojos, sin preocuparme por si quedaba muy claro (Pero sin exagerar). Aplique esto debajo de mis ojos y sobre mi rostro, en todo lo que necesitaba corrector.
2) I applied MAC studio Fix (shade NC42) with the sponge it brings, all over my face (Except my under eye area) with the same sponge that came with it in a tapping motion to make sure I got the full coverage it can offer. This can also be applied with a sponge or have several layers applied with a brush. If you do not need full coverage (GOD BLESS YOU) you can use a simple powder that shows your perfect skin. I then EVER SO SLIGHTLY tapped some into my under eye area (optional).
2. Aplique MAC STUDIO FIX (en tono NC42) sobre toda mi cara con la esponja que trajo (menos en las areas debajo de los ojos) y me lo aplique en topaditas y no arrastrando la esponja sobre mi cara para poder conseguir la cobertura maxima que este producto ofrece. Este paso tambien puede hacerse con una esponja normal o con una brocha, aplicando varias capas hasta lograr el efecto deseado. Si no necesitas una cobertura maxima (DIOS TE BENDIGA) puedes utilizar un simple polvo que ensene tu perfecta piel. Luego, LO MAS LIGERAMENTE POSIBLE con la misma tecnica aplique un poco sobre el area debajo de los ojos (opcional).

3) I then gave this some very good use. I LOVEEEEEE this, I completely recommend it. It’s like US$3.00 and I use it almost every single day. To contour I used the bronzer first and then used a mixture of the blush and the bronzer to blend everything together. Then I took the blush and applied some on my cheeks, and pressed the brush together in my hands to make it thinner and used it to contour my nose. I used the brush you see in the picture (It was the ONLY brush used in this process) to apply it and also used it to apply bronzer to my crease. To give my eyes some color I used the pink blush and applied it on my lids with my middle finger, making sure to apply it from the middle of my eyes inwards since the bronzer was beautifully blended in by the brush and since the brush was so big it gave my eyes a brown shade.
3. Luego le di a esta paleta bien uso. AMOOOOOOOOOO eso, y completamente lo recomiendo. Son como $3 dolares. Yo lo uso casi todos los dias. Para el contorno de mi cara utilice el color marrón primero, luego una mezcla de ambos colores para que los colores se matizaran y se viera mas natural y luego solo el rosadito en las manzanas de mis mejillas. Para todo esto utilice la brocha que pueden ver en la foto (es la UNICA brocha que utilizo en este proceso.) Tome la brocha entre mis dedos y la apreté para que fuera mas fina y la utilice tambien en el contorno de mi nariz. Con la misma brocha, utilice el bronzer para darle profundidad a mi mirada y lo aplique en el pliegue del ojo, difuminandolo bien. Luego con un dedo me aplique el color rosadito en los ojos para darle color y luminosidad, teniendo cuidado de aplicarlo desde el centro de hacia adentro, ya que al mi brocha ser relativamente grande al aplicar el bronzer le daba un tono marron a mi parpado movil por igual.

4) I used this version of THE FALSIES Maybelline Mascara. I applied one coat (because my eyelashes are long and with this mascara one coat is enough) and voila, the look was done. *
4. Use esta version de THE FALSIES Mascara de Maybelline. Me aplique una sola capa por que mis pestanas son largas y con este rimel una capa es suficiente. y Voila, el look esta completado*
*I don’t wear lipstick/lipgloss on a regular basis, hence me not using any on this tutorial.
*No utilizo labial ni gloss en un dia a dia, por lo tanto no lo aplique en este tutorial.
Thanks for reading ♣ Gracias por leer
Hope you enjoyed
REMEMBER, IT’S ONLY MAKEUP!~
10 de marzo de 2013
Maquillaje para miel Morena!~

Mi camara por fin funciona y puedo empezar a subir posts decentes. No puedo negar que amo tomar a mi hermanita menor y usarla como una muneca para hacerle el maquillaje y el pelo. En este caso, le hice un maquillaje con tonos medio anarajados que complementaron su piel magnificamente y la dejaron luciendo espectacular. Aqui les digo como.
Maquillaje para los ojos
- Antes que nada, aplique una pre-base en los ojos para que el maquillaje durara mas y los colores de este se vieran aun mejores.
- Luego utilize una sombra marron claro/mediano para usarla en el pliegue (la cuenca) del ojo. Dandole profundidad a la mirada. Hice esto como el primer paso para asegurar que el marron predominara o tuviera el mismo valor que el color claro.
- Tome un color anaranjado y lo utilice en el parpado movil, tomando en cuenta que queria alargar la mirada, por lo que lo aplique un poco afuera del ojo en una linea recta debajo del marron.
- Volvi al pliegue del ojo y esta vez utilice un marron oscuro, para poder definir la mirada y darle aun mas profundidad a la mirada.
- Aplique la misma sombra marron debajo del ojo y la uni a la sombra que venia del pliegue del ojo
- Aplique delineador liquido en negro e hice un pequeno “cat eye”
- Aplique dos capas de mascara Maybelline ‘The Falsies’
Espero que les haya gustado y gracias por leer! ♥
Recuerda, solo tu tienes poder sobre tu vida!~
Makeup for Dark Skin (Tutorial)
Makeup for Dark Skin “Tutorial”

~

Eye Makeup
- I started applied a light/medium brown on the crease of the eye, to give depth before I moved into the light color. I applied it in a windshield motion until a little bit outside the exterior corner of the eye. (The whole look was created with the Coastal Scents 88 Matte Palette)
- Afterwards, I took a slightly orange color and applied on the lid, making sure to also take it a little bit outside eye, to make the look more “cat eye-ish” and make the colors stand out more.
- I went back to the crease (this time with a darker brown) and applied it on the crease, making sure to blend the colors and make sure the color showed only in the outer corners of the crease.
- I applied the same dark brown in the bottom lid, and later connected that brown to the brown that came from the crease
- I cleaned up the eye to make sure it did not look like a mess on the outside corners of the eye
- I applied black liquid eyeliner, winged.
- I applied two coats of Maybelline The Falsies Mascara.
~
I completely love this look on her. I
think it complements her skin wonderfully and can be worn with both a
casual outfit as with a simplistic elegant one as well.
I hope you enjoyed and Thanksfor reading!
It is no one but us who has power over our lives!”
Suscribirse a:
Entradas (Atom)